3D Scanning
In the lab we have the Sense 2 3d scanner by 3d systems. This model is about 5 years old and could be bought around 400 euros (it’s discontinued now). Since it’s a pretty old model you may get better results with a newer smartphone application (like Qlone, ask Michelle to use the paid version). iPhones with the LiDAR chip have great scanning capabilities as well.

Process
Scanning
- Connect the scanner to the computer with the Sense 2 software via USB cable.
- Start up the software and specify whether you want to scan an object, head or a body.
- Point the scanner at the target until it’s properly framed.
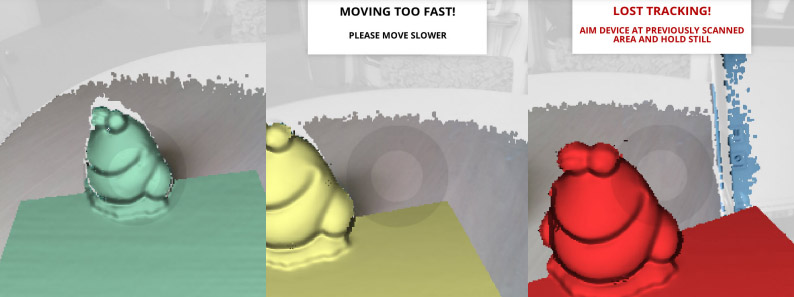
- Click play and start scanning the target while moving slowly. Scanned areas turn green in the software. If you move too fast the software will tell you and the model turns yellow. You’ll probably notice it’s pretty sensitive and loses track quite easily (model turns red on the computer screen). To get back on track, move back slowly to a spot you’ve scanned before until the scan turns green again.
Post-processing
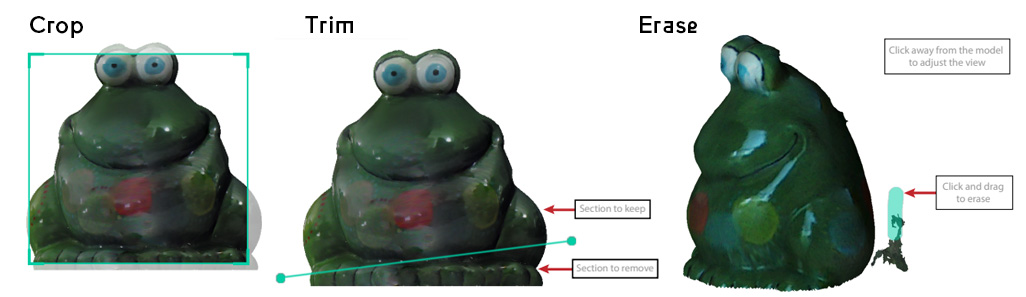
The Sense 2 software provides the following basic tools to clean up the model:

Operate the Crop, Trim and Erase tools with the mouse. Note that you can’t undo until after you’ve finished an operation, so if you made a mistake you first have to apply and then undo to start over.
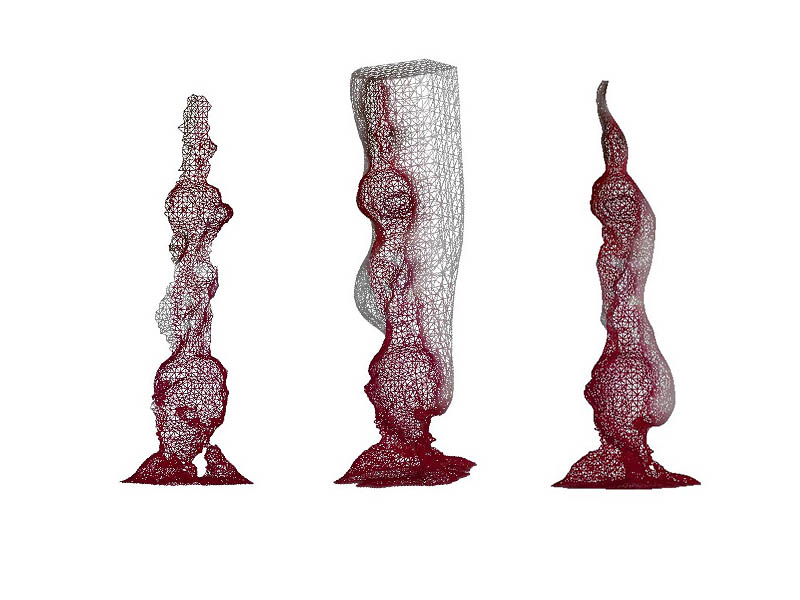
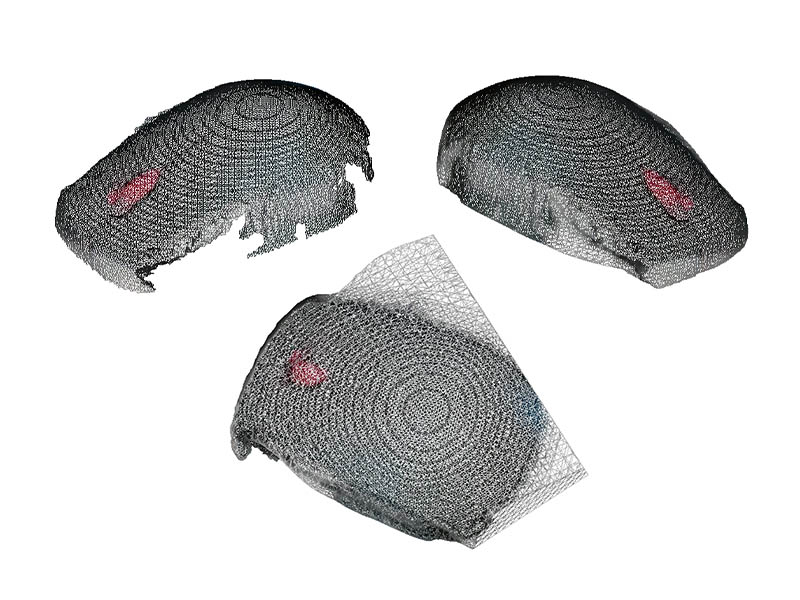
The images below show the 3 steps in the post-processing of the scans in the Sense 2 software: on the left the unprocessed scan, in the middle the solidified model and on the right the cleaned up model using the crop, trim and erase tools. In both cases the scan had to be started over multiple times because the camera lost track constantly. It wouldn’t scan half of the model and had to fill in the gaps using the software, which it’s not the best at. However the software provides some handy tools to clean up the model and after some tweaking and re-solidifying you can get a pretty okay 3D printable model.
When you’re done editing the model, click Finish & export the model however you want. You can also get the texture maps which is useless for 3D printing but useful for 3D rendering. For further editing you can use Blender sculpting.
Notes
- The Sense 2 is pretty good at scanning heads. When scanning a person, start in the back or you’ll get a very crooked face since the seam will be right in the middle.
- Make sure your lighting conditions are good: even light without stark contrasts works best.