How to use the Modela MDX 20
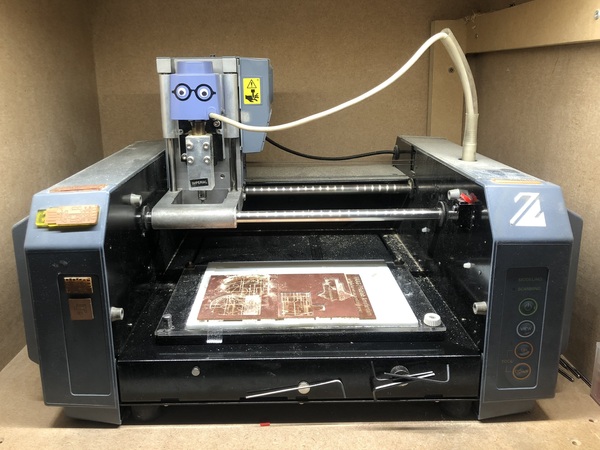
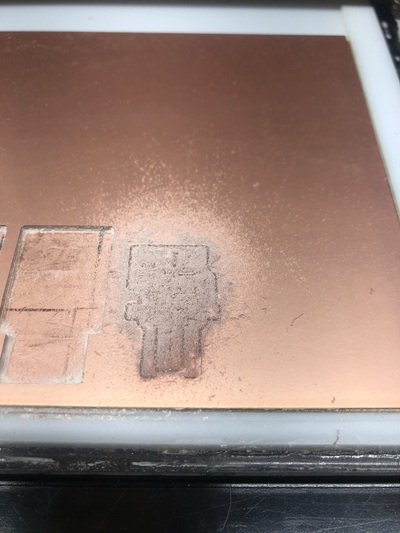
We have the Modela MDX-20 3D milling machine in the lab. We use mods to operate the machine. The copper plates (fr1) we use have pressed paper in between. We don’t mill fr4 (with glass in between) because it ruins your machine (dulls the bit very quickly) and it’s dangerous to have glass dust (to breathe it in or get it in your eyes). The Modela has a .006mm precision (in theory).
Steps
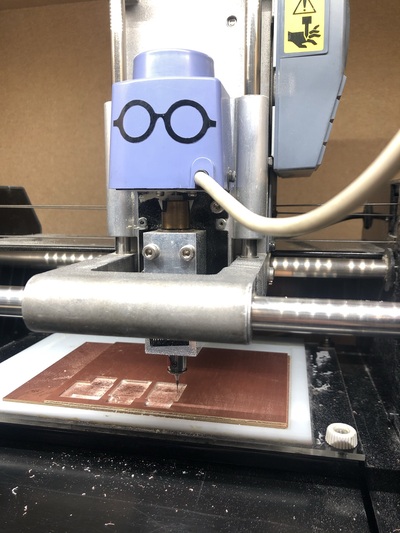
- Turn on the Modela. The machine moves to machine home automatically. It is now in view mode, indicated by the green light next to the view button. You can exit view mode . If there’s not enough room on the copper plate or there is no copper plate on the sacrificial layer, add a new one. Remove the bed with the screws on the side, then press the board tightly and perfectly flat with some clean fabric on the bottom to protect against scratches, and the acrylic on the top to apply pressure. Stick the copper plate to the bed with double sided tape (clean surfaces first with sticker remover); completely fill it up but don’t let the tape overlap, otherwise it’s not level
-
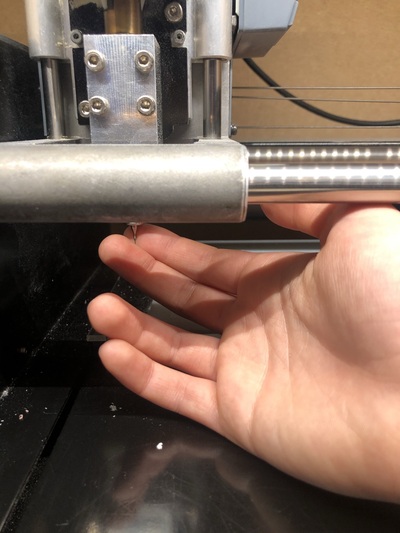
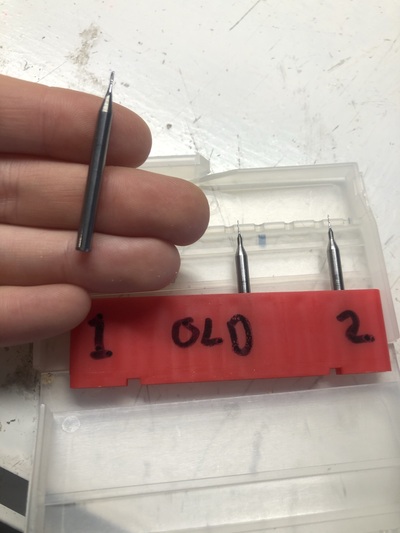
Now replace the milling bit if it’s not the correct one. Move the head up so you can take out the milling bit. You can’t release the grub screw and let the milling bit fall out because it will break. Hold one finger against the milling bit and take it out in a controlled way. For traces we use .4mm milling bits (one or two flute) or .25mm conic bits

-
Put the milling bit in all the way up, so it’s sticking out a little bit
-
Start up mods:
- Locally: start mods by typing
cd modsfollowed bybash modsin the terminal to fire up a serial server connected to the Modela. Chromium is going to open automatically. - Via the browser: go to modsproject.org in Chrome/Chromium.
Right click and navigate to
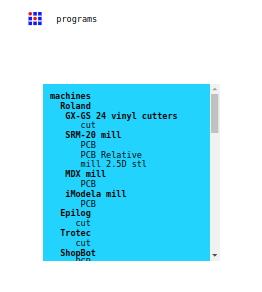
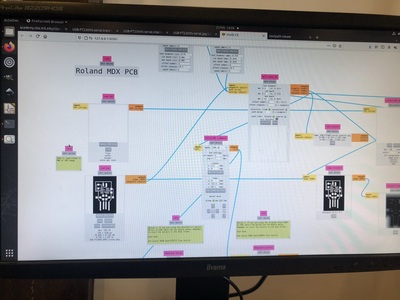
select Programs > Open program > Roland > MDX Mill > PCB
- Locally: start mods by typing
-
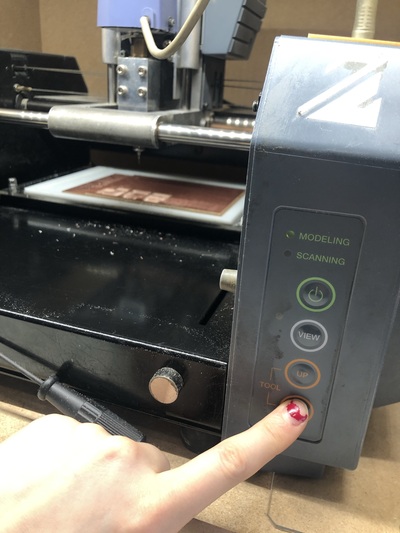
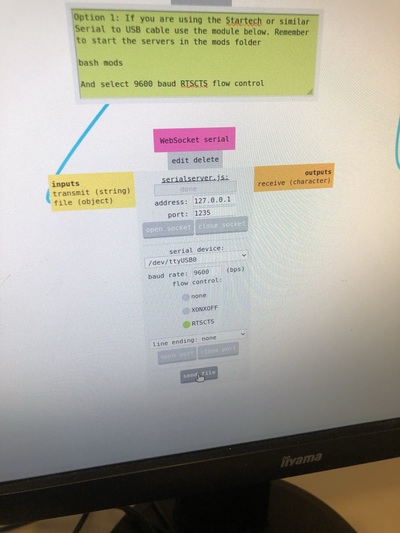
Connect to the Modela:
- Locally: close WebSocket pyserial, close the pyserial port, then close socket and port for the WebSocket serial, then open socket and open port there.
-
Via the browser:
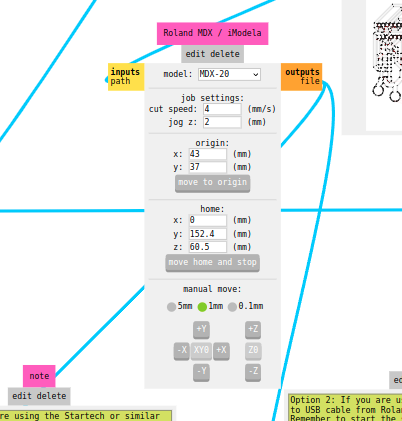
WebSerial > Get Deviceand select the device at the bottom of the list Try moving to the origin to check if there’s a connection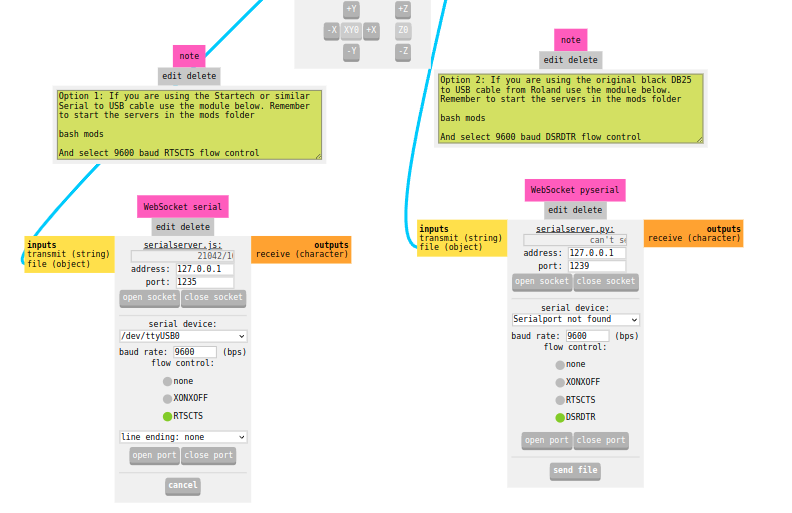
-
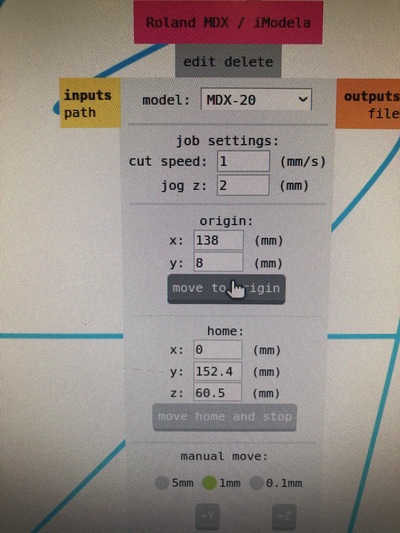
Move the machine to the left bottom corner (when looked at the machine from above) of where you want to start milling; do this by changing the origin value in mods and clicking
Move to origin. Write down or take a picture of the X and Y value (or make sure to remember it). Then move the all the way down with the machine with the buttons on the machine (not in mods) and then move it little bit higher. You can only do this when the milling bit is all the way up. The bit is floating above the material. Now we can lower the bit with support of two fingers to touch the material (the actual material, not the sacrificial layer); wiggle it in case there’s dust so it’s resting perfectly on the material and then secure it. Tighten it snugly, not aggressively. The machine is now ready to mill- If you move the origin, you also have to redo the Z axis alignment. This has to do with the imperfections of the board; it does remember where the 0 point was but just to have it as precise as possible you have to redo it
-
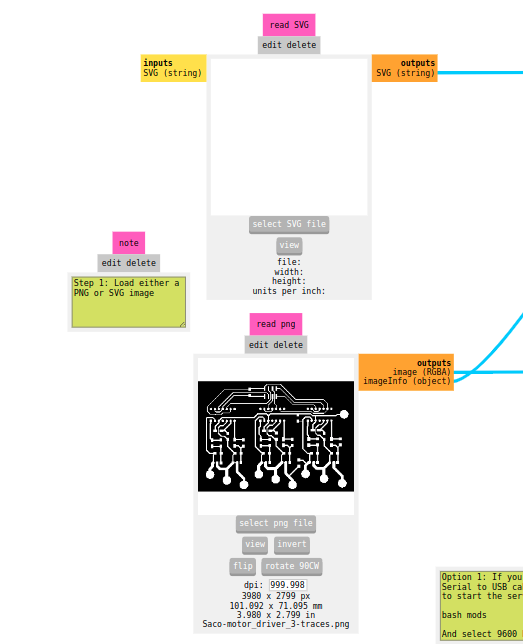
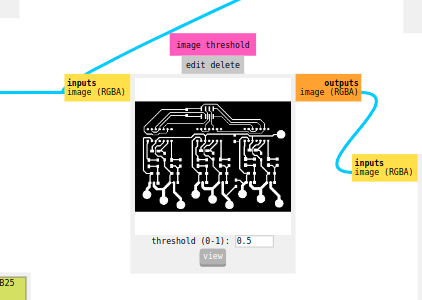
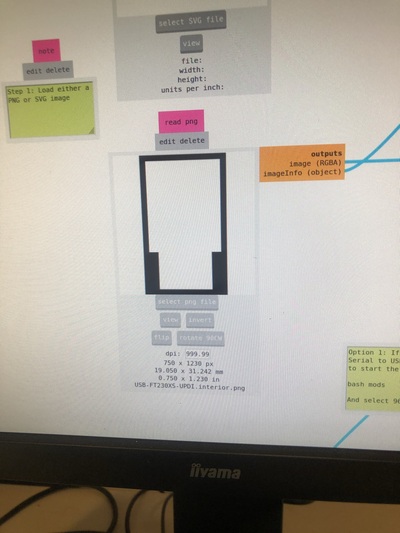
Now you start with the traces in mods (PNG or SVG); one image at the time. White is the area you want to keep. When using a PNG it’s wise to set DPI to 1000; if you have issues with not all of the traces being translated to proper traces, you can play around with the image threshold. When using SVG, make sure that the DPI is correct (you can check with the width and height indicated in the first module)
- When using an SVG directly from KiCad, DPI should be set to 90. When using an SVG modified in Illustrator, DPI is usually 72
- When modifying SVGs in Illustrator, save the SVG with responsive unchecked and with decimal value set to 7, otherwise it doesn’t work
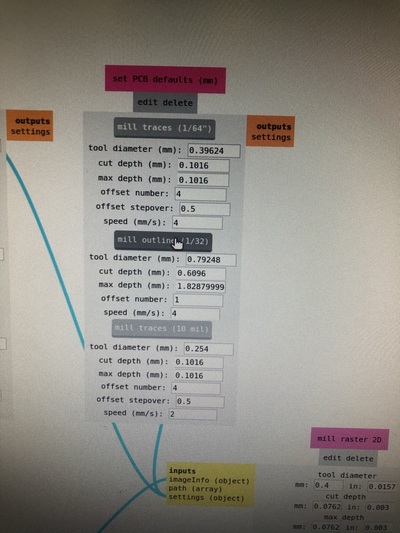
Select the PCB defaults in mm,
mill traces (1/64").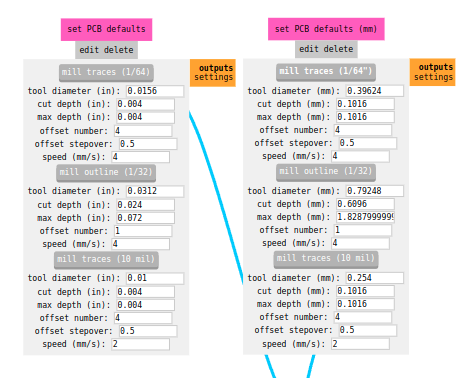
-
Settings for milling traces:
- Tool diameter is 0.4mm (also when using the conic .25mm bit)
- Cut depth and max depth is 0.002-0.00325 inch (numbers from experience); this will cut through the top copper layer. If you want to mill deeper, lower the speed
- Offset number is the (maximum) amount of traces from the lines you want to keep. 4 is nice, it makes it easy to solder and doesn’t take forever. 0 mills away everything except the traces
- Offset stepover: half of the tool diameter
- Direction: just leave at climb, it doesn’t really matter
- Path merge is 1 (diameter of the tool)
- Path order forward/reverse: Just use forward
- Sort distance: checked
- Cut speed 4mm/s
-
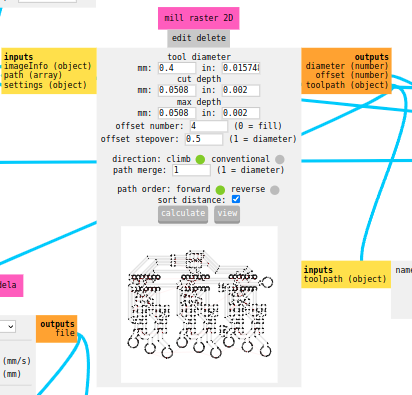
Press
Calculateafter you changed something - Click
Web socket serial > send fileand it will start milling straight away
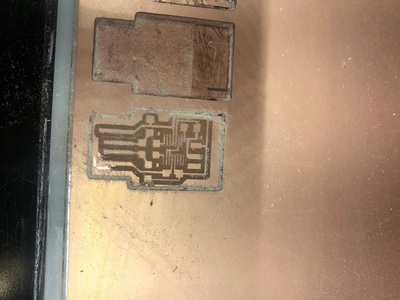
- When it’s milling, keep an eye out for whether it’s milling all the way through the copper layer. If it’s not you’ll usually see that there’s not a lot of dust and/or you still see copper where the mill has already been. If it’s not going through, you can pause by pressing the view button on the machine, and double check. To stop the job (not just pause it), you have to press the UP and DOWN for a couple of seconds and close the connection with mods (stop the server or refresh the tab). The flashing lights indicate the memory is being erased. When it’s done, the lights stop blinking. Then reload the job and relevel Z
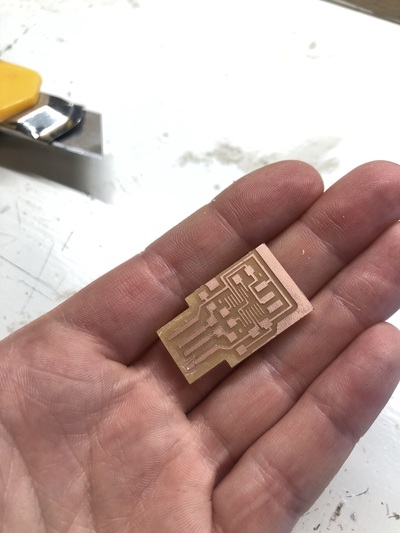
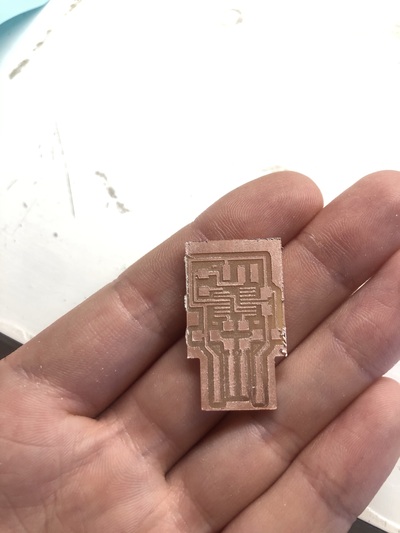
- When it’s done vacuum the dust and check if everything was milled properly

-
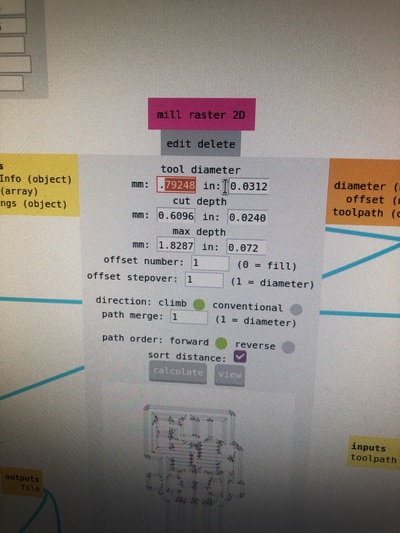
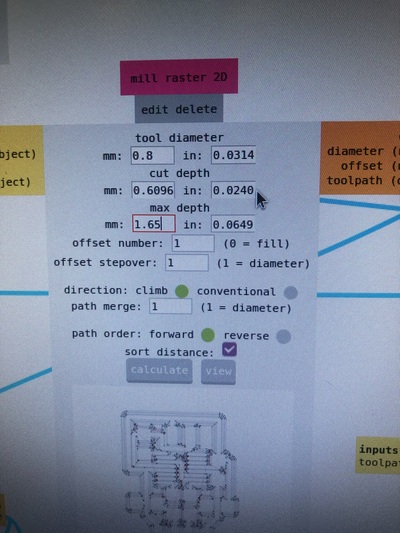
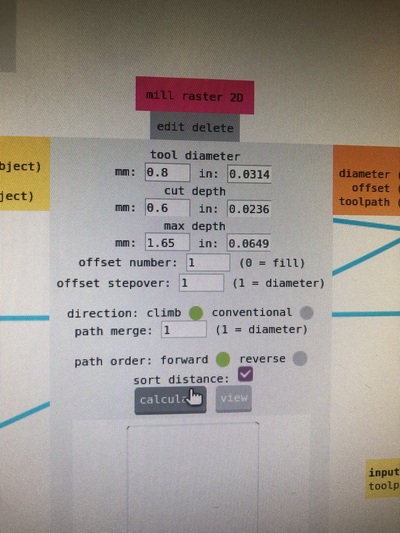
Now for the cut-out you need your other file and the .8mm or 1mm milling bit. Repeat the steps above. Speed is 4mm/s again, cut depth is 1,55mm (or more depending on the thickness of the specific copper plate) and .6mm per layer cut depth
-
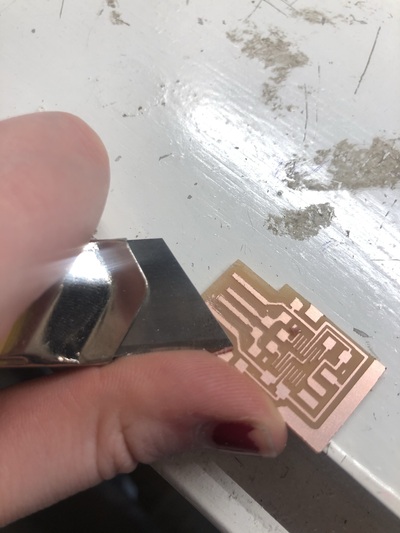
Take the PCB out with with a small screwdriver
-
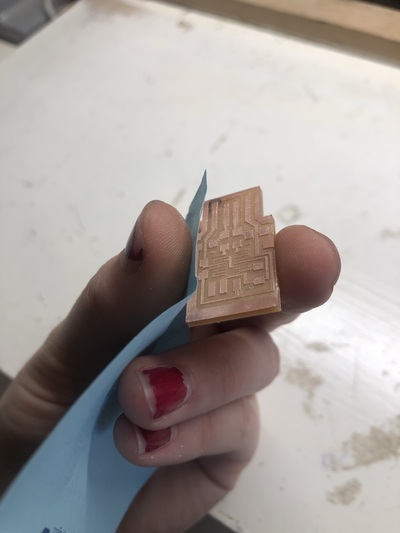
When the lines are rough you can sand them with paper
-
If you didn’t clear out the entire board, make sure to clear out the USB traces if you have them
18. Rinse the PCB with some water and soap to get rid of dust and grease before soldering