How to use the BRM Laser Cutter
Laser Cutter & Fume extractor
The laser cutter we have in the lab is a 150 Watt BRM 90130 from 2016. This machine replaced our previous BRM laser cutter in December 2023. The fume extractor is a BOFA AD Oracle.
Safety
- You are only allowed to use the laser cutter when there is at least one other person on the same floor
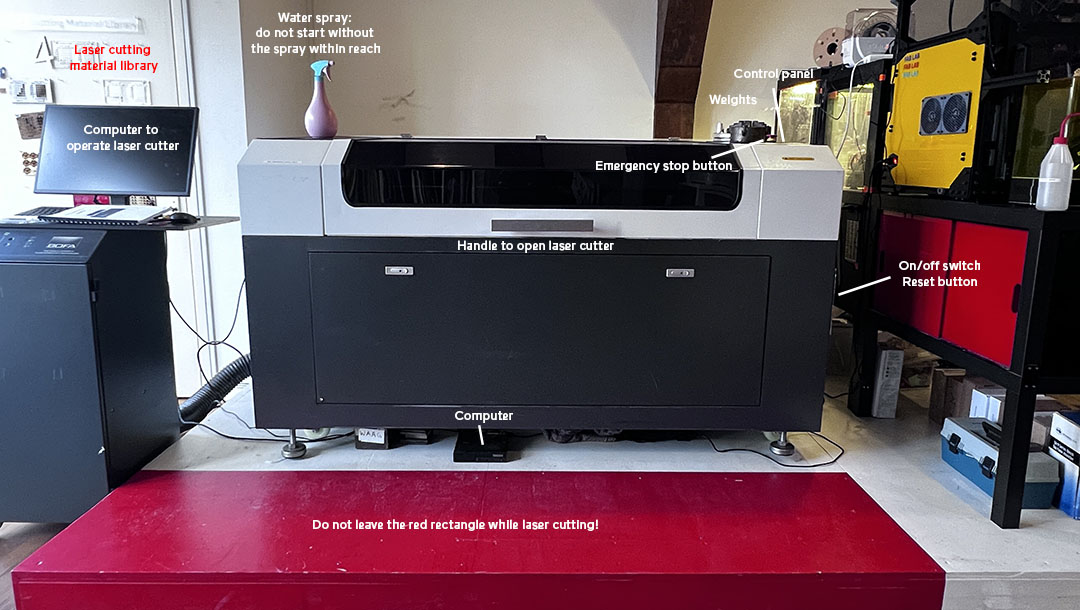
- Never leave the red square when the laser cutter is cutting
- Always check if the water spray is within reach and filled with water
- When you see something starting to burn, stop the job immediately and use the waterspray which is located on the side of the laser cutter
In case of fire:
- Call for help, and call 112
- Turn off the laser with the red stop button (on the right side above the control panel)
- Turn off the fume extractor
- Keep the laser cutter closed to let the fire die out because of oxygen starvation while monitoring it closely, or if you are going to attempt to extinguish the fire, use the fire extinguisher reel (not the small hand extinguisher)
- The priorities are you and the building, not the machine
How to use
-
Turn on the computer. The computer is located under the laser cutter (see picture above)
-
Plug the USB stick containing your file into the computer
-
Import the file to Lightburn (for more details on how to use Lightburn see the Lightburn page)
-
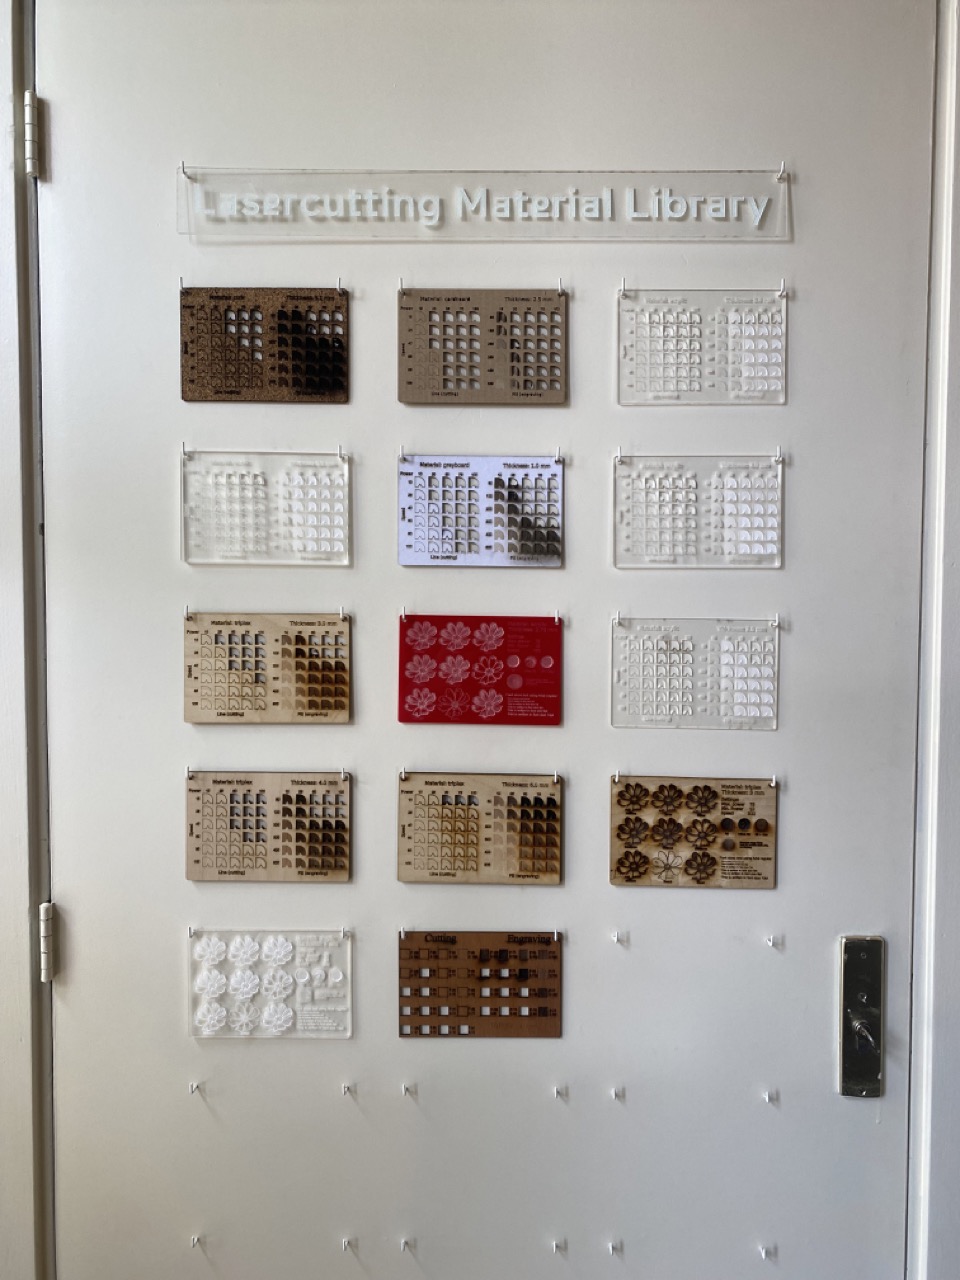
Set speed & power. To choose which speed & power to use you can take a look at the physical material library (located left of the laser cutter), or pick a setting from the Lightburn material library. Please note that these are just indications, you should always do a cut test yourself.
-
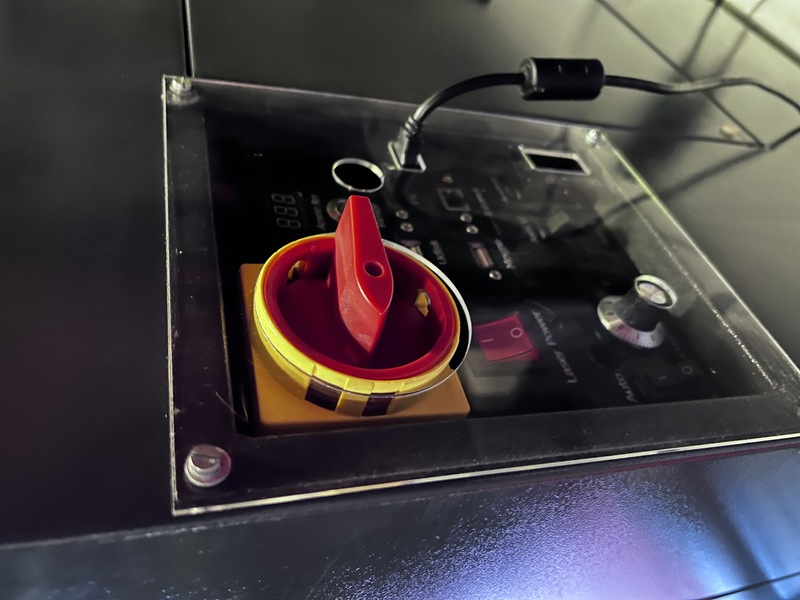
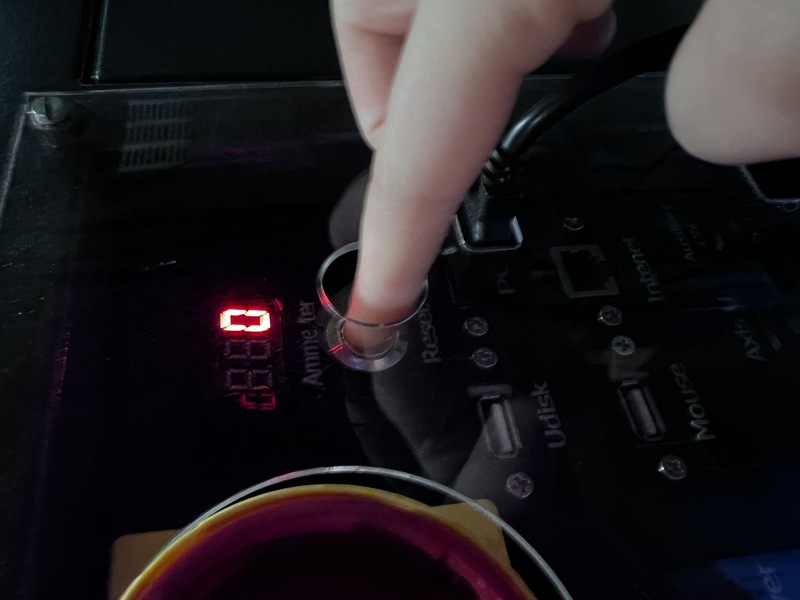
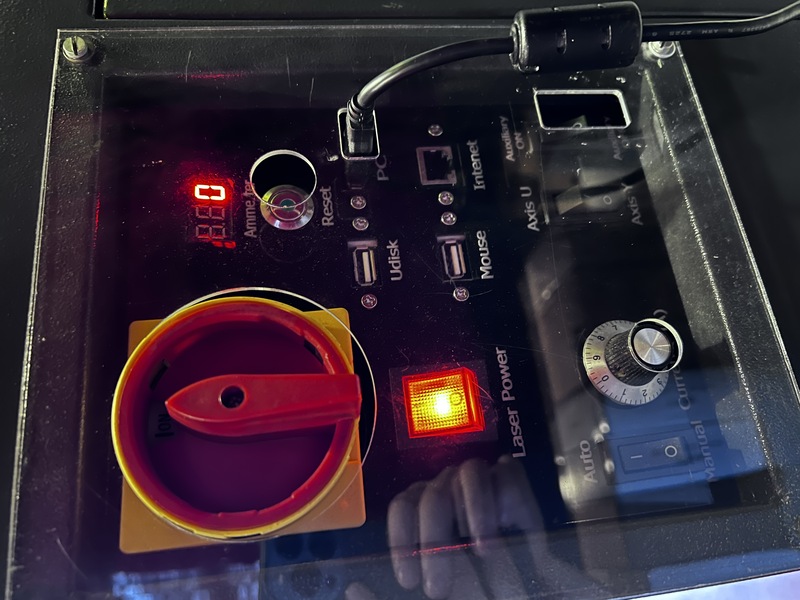
Turn on the power of the laser cutter by turning the power switch from OFF to ON followed by pressing the RESET button. The laser head will move to the back right corner of the machine (machine home, where the end stops are located). Once homed it will move back to its last position
-
Place your material on the bed of the laser cutter.
- Use both of the handlebars to open and close the laser cutter.
- To avoid the material from moving, you can use tape to secure the material to the laserbed. You can also use the bricks on the side of the laser cutter, but make sure the laser will not move against the bricks.
-
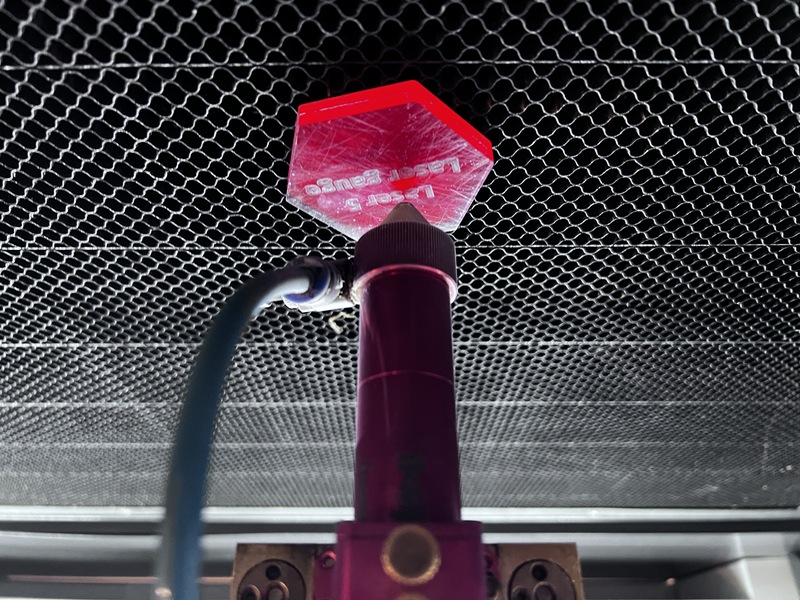
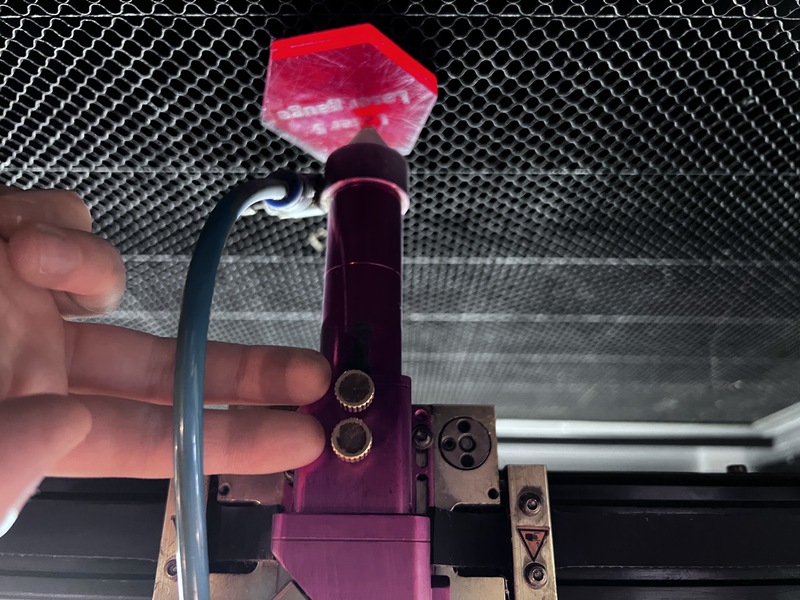
Level the Z axis of the laser by loosening the two bolts as pointed to in the second picture. Place the acrylic laser spacer on top of your material to level the Z axis. When the bottom of the laser head touches the spacer, tighten the bolts
-
Move the laser head to the X and Y position where you want to start. You can only move the laser head with the door closed. For this you can either use the arrows in Lightburn or on the power panel. We only work with the starting position set to Current Position in Lightburn. You can specify which corner this is in the software (always do a double check)

-
Use “Frame” in Lightburn to check the placement of your design on your material
-
Turn on the fume extractor (left, underneath the computer screen)
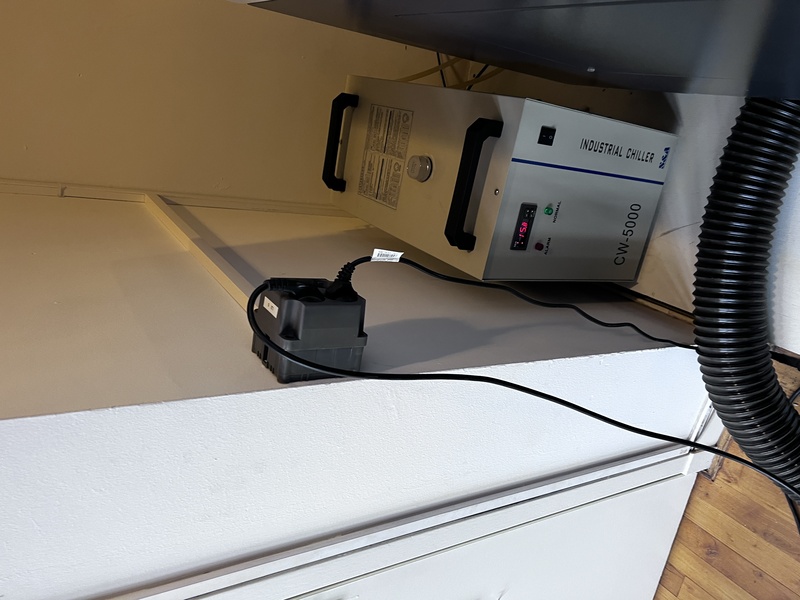
- Currently the fume extractor is hardwired and has to be turned on by plugging the power plug in the outlet directly (located behind the computer screen)
- You can also see the industrial chiller in this picture. Never turn it off manually!
-
Press Start in Lightburn to start the job. While the machine is cutting, do not leave the red area in front of the machine
Turn off the laser head switch after the job, but leave the fume extractor on and the laser cutter closed for a few more minutes. You may be in a rush, but the people working in the fablab do not want all of the fumes coming from your project in their lungs :-)
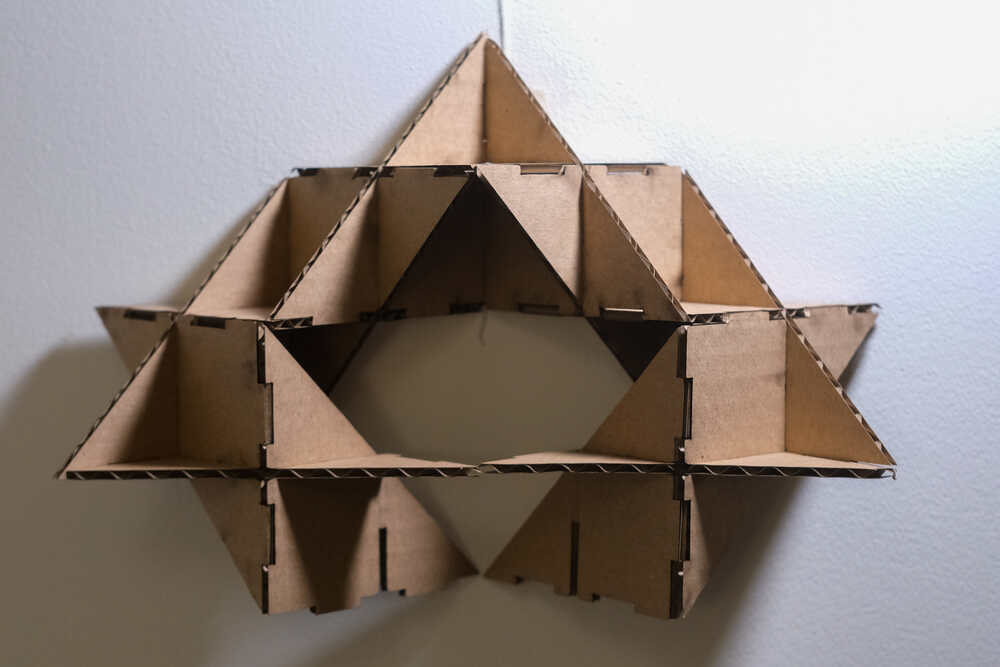
Made @ Fablab
Click the images to visit the documentation pages of the projects